Windows 8 Pro Box

Hace un par de dias lei un blog post donde anuncian que la gente puede pre-ordenar Windows 8 Pro por $69.99, desde Amazon. Incluso al visitar la pagina de Amazon de preventa de Windows 8, se menciona una promocion en la que regresan $30 dolares en credito de la tienda online (si se ordena antes de Octubre 20), lo cual dejaria el costo de Windows 8 Pro en $40 dolares.

La muy notable reduccion en el precio a comparacion de ediciones anteriores de Windows (no recuerdo precios exactos, pero Windows XP y Windows 7 solian costar arriba de $200 dolares por una edicion comparable a la Pro) me hizo pensar que ahora es cuando varias empresas, oficinas y profesionistas independientes mexicanos pueden cambiarse al lado legal y quitarte de algunos problemas y riesgos.

$70 dolares. No es nada descabellado para un profesionista y mucho menos para una empresa, incluso micro empresas.

Los dos principales riesgos que se me ocurren de instalar ediciones piratas o crackeadas de Windows son:

  1. Pueden tener virus o backdoors integrados desde antes de que lo instales, para hacer tu computadora parte de una Botnet, o simplemente poder robarse informacion (hasta financiera) de la computadora en que se instale el Windows pirata. Una version legal de Windows te permite descargar tambien el antivirus gratis de Microsoft.
  2. Riesgos legales, auditorias, etc. Que necesidad de arriesgarse a multas o cosas por el estilo cuando se puede pagar $70 dolares por una edicion legal de Windows, cuyo gasto hasta se puede deducir de impuestos.
Espero que esta reduccion de precio que Microsoft hizo realmente impacte de manera positiva a las empresas y profesionistas mexicanos.

Como asignar numeros al azar (random) a un campo en SQL Server

Ayer, para probar un code fix, tuve que actualizar el valor de una columna numerica en una tabla de SQL a valores random. No recordaba haber generado numeros al azar en SQL antes, asi que tuve que buscar como hacerlo. Encontre la siguiente manera, por si a alguien le sirve:


UPDATE TableName SET Field1 = ROUND(RAND(CHECKSUM(NEWID())) * (85 - 17), 2) + 17

Donde 17 es el limite inferior, 85 es el limite superior, y 2 el numero de decimales que se desean.

La formula la encontre en la siguiente pregunta de StackOverflow.com: SQL Server: fill a column with random decimal numbers

How to automate GMVault in OSX with Cron

Having just made the switch to OSX, I was clueless about how to trigger GMVault to make a quick daily backup of my GMail account. Fast forward a few google searches and I’ve got it working, but 100% the way I want it to work. In Windows, it would’ve been easy. Open Task Scheduler, find the executable you want to call, set the frequency of the task, and you’re done. Windows also provides logging for each task that you schedule, which is great.

In OSX, you apparently have a few different ways of doing it, none which I found easy or intuitive.

Automator was not helpful. GMVault is not a .app per se, so using the “Launch Application” option of a workflow wouldn’t let me select the GMVault binary. I gave up on that. I read that Launchd replaced Cron. But, Launchd appears to be XML based. I hate manually editing XML files, so Launchd is out of the question. Then there’s cron. Syntax seems fairly simple. I had trouble with Vim being the default editor for crontab. I hate Vim. So after a lot of googling, here are the steps I used.

1. crontab -l > mycron (to create a text filed called “mycron” which contains existing cron jobs)
2. echo “30 22 * * * path/to/gmvault sync -t quick myemail@gmail.com > ~/gmvault.log 2> ~/gmvault-error.log” >> mycron (this added this new cron job to the mycron file, which contained pre-existing tasks, if any).
3. crontab -r (to delete all existing crontab jobs, since they will be added when adding the mycron file)
4. crontab mycron (load the previously existing cron jobs, plus the new GMVault one).
5. rm mycron

That’s it. The things I didn’t like about cron is that it doesn’t provide any job-specific logging by default. Not even when there were errors when executing the job. The other thing was that even though one logfile is for success and the other one for error (at least that’s what I got from the articles I read), running the crob job creates both files, regardless of if the job was run successfully or not. Other than that, the syntax is fairly simple. Another thing I did not like is that I have no easy way of knowing if a job executed a given day. I tried modifying the bash command to make the log filename be date-based, but haven’t been able to get it there. I’ve tried a couple of variations of the $date function but haven’t been able to get it working yet.

These are all the pages I used in reference:

Anyways. Hope this helps someone.

Additional adjustments to make Windows 8 look better in a MacBookPro with Retina Display

Apple did a very decent job on the default way that Windows 8 looks when installed in a BootCamp partition, however, there are still a few quirks that need to be fixed, like:

1. The size of the title of each window.
2. The font size in a Console or Git Bash window.

Pretty much every website that has reviewed Windows 8 in the MacBookPro with Retina Display already suggests changing the scaling of the fonts to custom, 200%, and that is the sweet spot for that. However, I haven’t seen that any of those sites suggest to fix the default font size for the title of each window, which is so small that just shows as 3 or 4 dashes. The weird thing is that after testing the initial adjustment to do it, the smallest setting does look legible, not the way it looked as it did the before making an adjustment at all. So, whether it looks illegible to you or just really small, it would look like this:

Uhm, the screenshot looks huge on regular resolution. The thing is if you’re using the default resolution of 2880 x 1800, the font size of each window will look illegible.

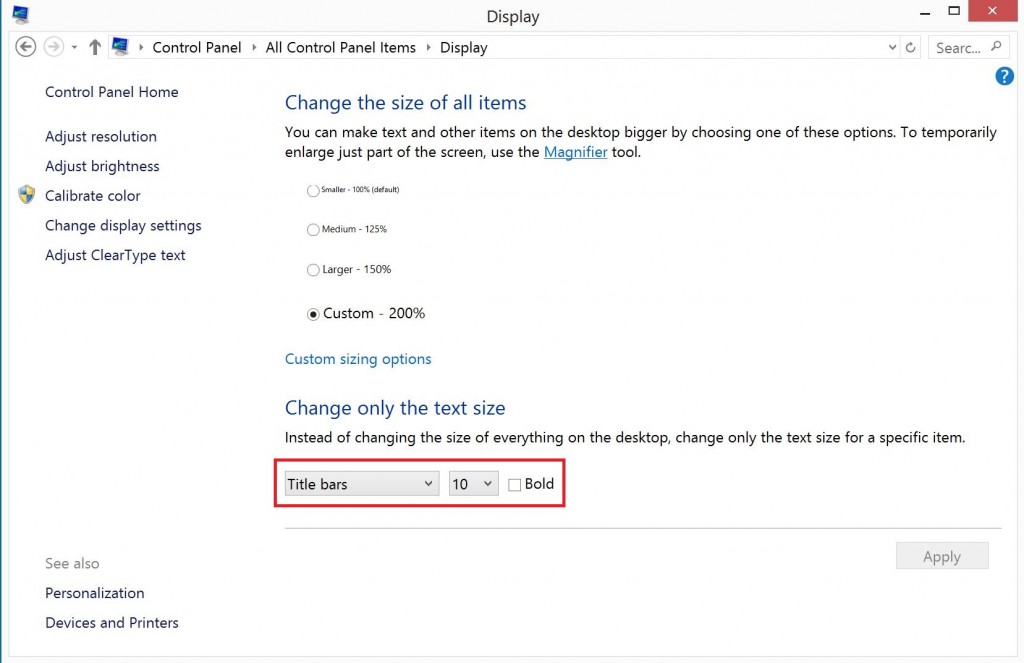
To change the size, just go to the Display panel of Windows (Right click on Desktop, Personalize, select Display on the left side panel), and on the lower side of the panel you will see the “Custom Sizing Options“. Select “Title bars” from the dropdown, and change the font size to 10 or whatever you feel comfortable with. Then, titles will look way better, like this:

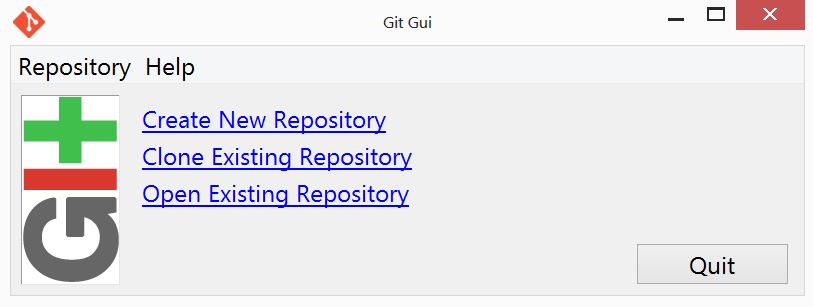
So, onto the next thing. If you use the Command window, or the Git bash window, the font size looks terrible as well. And even if you manage to change what appear to be the defaults, or change the font size for the current window, the next time you launch the program (in the case of Git Bash), the font size will look terrible again, like this:

As I said, you might’ve tried to right click on the title bar and change the font size using the Defaults or Properties menu option. But you will realize that Windows just will not preserve the changes if you do it that way. In order to get it to work, you have to:

1. Open a Windows Explorer window
2. Locate the Git Bash shortcut in C:\Program Files (x86)\Git
3. Right click it, select Properties.
4. Go to the Font tab.
5. Make whatever changes suit you.
6. Hit Save. Windows will say you need to provide Administrative privileges to make that change. Click Continue.

And that’s it. Everytime you launch the Git Bash from now on, the font size will be whatever you set it to be. As for the Command window, actually changing the Defaults will work. Just:

1. Launch a Command window (Run -> cmd -> Enter)
2. Right click the icon on the top left corner, select Defaults
3. Go to the Font tab.
4. Change the font size to whatever you want, click OK.
5. Close and re-open the Command window. Font looks good now.

That’s one of the quirks I faced today, and hopefully it’ll save someone some Google time. Hope it helps.

1 2 3 4 31  Scroll to top