Problemas y Soluciones

How to fix Google Drive error c24e where the sync button does not work or do anything
I upgraded one of my computers to Windows 8 today, and when I installed Google Drive and chose a custom setup configuration to only sync some of my folders, I got some weird behavior from Google Drive.

After selecting all the configuration options (leaving the default folder as it is), clicking the Start Sync (or Sync) button wouldn’t do anything at all. No feedback, no error message, no alert, no event viewer message, nothing. I waited for a few minutes, tried again, nothing. I uninstalled Google Drive, tried again, nothing.

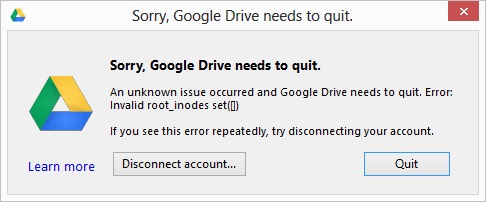
After a few minutes, I got an alert box that just mentioned error c24e, and a few more tries gave a different error: An unknown issue occurred and Google Drive needs to quit. Error: Invalid root_inodes set.

A few minutes of google searches, and found a very long Google Products Forum post about a lot of people having this very same error.

Apparently, one of the possible causes of this error is having two accounts with the same username (one local, one domain), which I had. The error has to do with folder permissions, more specifically, the account the user is logged on not having access to the created Google Drive folder by the installer, which is weird, since I installed with that user. I even tried to give my account full access to the folder, but that did not work.

Anyways, the fix is simple:

  1. Uninstall Google Drive
  2. Manually delete the Google Drive folder from your computer.
  3. Manually create a folder with the same name (after creating, confirm your logged in account has full access to the folder).
  4. Install Google Drive
  5. Success.

It worked for me. Another possible solution could be to just to use a different folder from the default one.

Hope it helps.
Additional adjustments to make Windows 8 look better in a MacBookPro with Retina Display

Apple did a very decent job on the default way that Windows 8 looks when installed in a BootCamp partition, however, there are still a few quirks that need to be fixed, like:

1. The size of the title of each window.
2. The font size in a Console or Git Bash window.

Pretty much every website that has reviewed Windows 8 in the MacBookPro with Retina Display already suggests changing the scaling of the fonts to custom, 200%, and that is the sweet spot for that. However, I haven’t seen that any of those sites suggest to fix the default font size for the title of each window, which is so small that just shows as 3 or 4 dashes. The weird thing is that after testing the initial adjustment to do it, the smallest setting does look legible, not the way it looked as it did the before making an adjustment at all. So, whether it looks illegible to you or just really small, it would look like this:

Uhm, the screenshot looks huge on regular resolution. The thing is if you’re using the default resolution of 2880 x 1800, the font size of each window will look illegible.

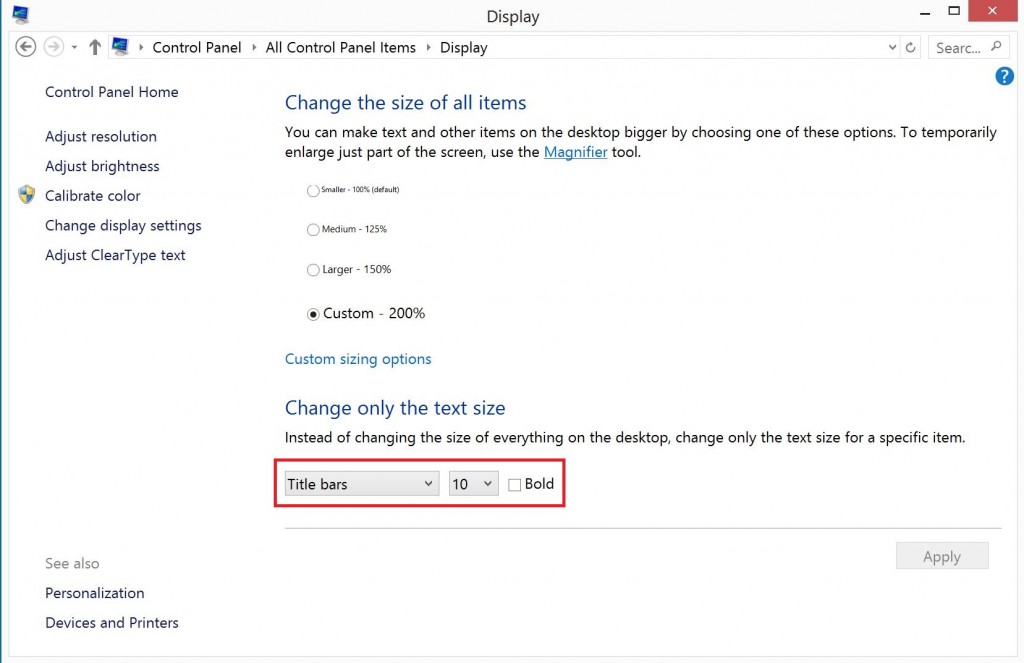
To change the size, just go to the Display panel of Windows (Right click on Desktop, Personalize, select Display on the left side panel), and on the lower side of the panel you will see the “Custom Sizing Options“. Select “Title bars” from the dropdown, and change the font size to 10 or whatever you feel comfortable with. Then, titles will look way better, like this:

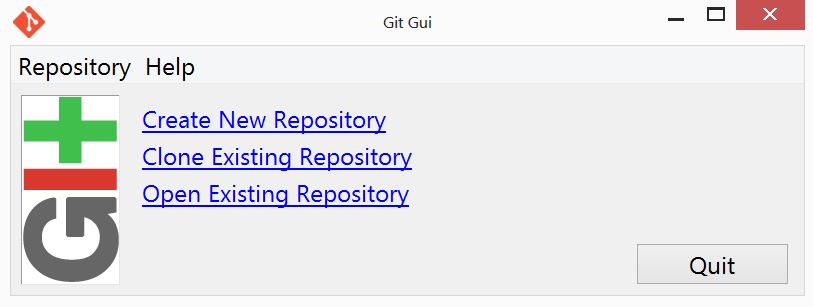
So, onto the next thing. If you use the Command window, or the Git bash window, the font size looks terrible as well. And even if you manage to change what appear to be the defaults, or change the font size for the current window, the next time you launch the program (in the case of Git Bash), the font size will look terrible again, like this:

As I said, you might’ve tried to right click on the title bar and change the font size using the Defaults or Properties menu option. But you will realize that Windows just will not preserve the changes if you do it that way. In order to get it to work, you have to:

1. Open a Windows Explorer window
2. Locate the Git Bash shortcut in C:\Program Files (x86)\Git
3. Right click it, select Properties.
4. Go to the Font tab.
5. Make whatever changes suit you.
6. Hit Save. Windows will say you need to provide Administrative privileges to make that change. Click Continue.

And that’s it. Everytime you launch the Git Bash from now on, the font size will be whatever you set it to be. As for the Command window, actually changing the Defaults will work. Just:

1. Launch a Command window (Run -> cmd -> Enter)
2. Right click the icon on the top left corner, select Defaults
3. Go to the Font tab.
4. Change the font size to whatever you want, click OK.
5. Close and re-open the Command window. Font looks good now.

That’s one of the quirks I faced today, and hopefully it’ll save someone some Google time. Hope it helps.

ASP.NET Bundling and Minification Gotcha #1 – Javascript bundle not rendering

ASP.NET Logo

Having used a couple of other bundling and minification libraries like Cassette and RequestReduce in the past, I started playing with the new bundling and minification features in ASP.NET 4.5. While setting up bundles is easy, there are quite a few gotchas that are not yet fully documented on the web.

This specific situation/gotcha took me a couple of hours to figure out, and I almost gave up on using Microsoft’s bundling completely.

In order to ease debugging for us developers, bundling and minification only happens if one of the following conditions are met:

1. You’re running with <compilation debug=”false”> on web.config (or without the attribute at all)
2. You force Bundle Optimizations to be ON by specifiying BundleTable.EnableOptimizations = true; on the RegisterBundles method.

When you’re running in debug mode, the files specified on bundles will not be minified or bundled, and tags will be rendered for each file in the bundle.

While that is great, the problem is the way Microsoft assumed that all developers have both development and release versions of each script that they use. As in, if you’re using jQuery, and you want to add jQuery to a bundle, Microsoft will expect you to have both the jQuery-1.8.0.js and the jQuery-1.8.0.min.js files added to your solution.

If you only have the .min.js file in your project, you configure your bundle to use that already-minified script, and you’re running in debug mode, any .min sripts will not be rendered in debug mode. What’s worse, if you only had .min.js scripts in that bundle, nothing will be rendered for it, as if it did not exist or was not configured, nada. No HTML tag for it.

Why?

Because as this StackOverflow question’s accepted answer states, there is a default ignore list that is enforced when rendering the bundle, and for debug mode, all *.intellisense.js, *-vsdoc.js, *.debug.js, *.min.js and *.min.css files are completely excluded from being rendered, because again, Microsoft assumed that you have both release and debugging versions of the scripts or stylesheets that you use in your project.

To be fair, the official tutorial on ASP.NET Bundling and Minification, does mention of some of the conventions, but it can be confusing. The post states:

“Selecting the non “.min” version for debug.”

“Selecting” implies you have choices. If a project only has release (.min.js) versions of a script, they are not added. If they had two choices, but one of the choices is not even an option in the situation, they should default to the other option, not to ignore the script. The post should have stated

“Only non .min versions are included for debug”

Their intention is good, but I believe the assumption/implementation is a bit flawed. I feel if they’re going to ignore a file that you explicitely specified in your bundle configuration, they should at least check for existance of the debug version of the script in your project before ignoring your request to add the release version to the bundle.

So, in order for your bundle to render those .min.js scripts, you have two choices.

1. Just add the debug version of the script you want to use to your project.
2. Clear the ignore list of the bundle (or just the entry you do not want ignored), although there might be side effects to that if you have other scripts of which you do have both versions.

Hope this saves someone a headache.

Como borrar entradas individuales del historial de formas AutoComplete de Internet Explorer

Un tip muy sencillo pero no tan obvio..

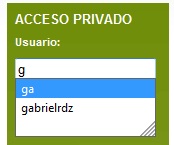
Si acaso tienen que utilizar Internet Explorer para acceder a algun sitio, y por algun error se grabo un usuario incompleto o incorrecto en la seccion de Auto Complete, al momento de teclear el usuario en otras ocasiones, el texto del usuario incorrecto (o incompleto) sigue apareciendo como opcion para autocompletar, lo cual puede resultar ser muy molesto. Un ejemplo visual es el siguiente:

El usuario correcto es gabrielrdz, pero en alguna ocasion teclee “ga” y probablemente hice click en Enter por error, causando que se grabara “ga” como una entrada de AutoComplete.

Al estar acostumbrado a Chrome o Firefox, donde se pueden borrar o editar cada entrada de autocomplete individualmente, fui a las opciones de Internet Explorer para borrar el usuario incompleto, pero no habia opcion para ver/editar entradas individuales, solo para borrar completamente toda la informacion de AutoComplete.

Para borrar una entrada incorrecta de Internet Explorer AutoComplete, lo unico que hay que hacer, es hacer que se muestre la lista de autocomplete que deseamos editar, tener seleccionada la entrada que queremos borrar, y hacer click en la tecla de Delete.

Espero les sirva.

1 2 3  Scroll to top